If you have a windows phone 7 and develop application then I guess you will like to have an emulator that looks exactly like you’re phone.
This is exactly what I am going to show ho to do in this blog post.
Note: If you don’t care how to make one and you want the HTC Motzart skin then just downland the files from here HTC Mozart Emulator and add them in ” C:\Program Files (x86)\Microsoft XDE\1.0″.
But if you want to know how is made and how to make you’re custom skin then read all post.
Important: Please make a backup of the existing WM7_Skin.xml , just in case, or just take them from here “C:\Program Files (x86)\Microsoft SDKs\Windows Phone\v7.1\Emulation”, if you want to have the original skin.
So let’s understand what is happening:
The emulator image of the emulator is stored on “C:\Program Files (x86)\Microsoft SDKs\Windows Phone\v7.1\Emulation” but the images are also stored here “C:\ProgramData\Microsoft\XDE\1.0″ .
The images that are taken by the emulator are actually taken from ” C:\Program Files (x86)\Microsoft XDE\1.0″ , this is the magic place.
We will edit WM7_Skin.xml to reference the images and replace the WM7_Skin_Down.png , WM7_Skin_Up.png and WM7_Skin_Mask.png with some images that should meet some exact specifications:
1.The display screen from the image should be the same dimensions ( 480/800).
2.The mask image colored rectangles should be exactly over the buttons in our image.
3. The XML file should reference our new images and screen start position.
Let’s do it now:
1 Search an image and edit it to meet the requirements
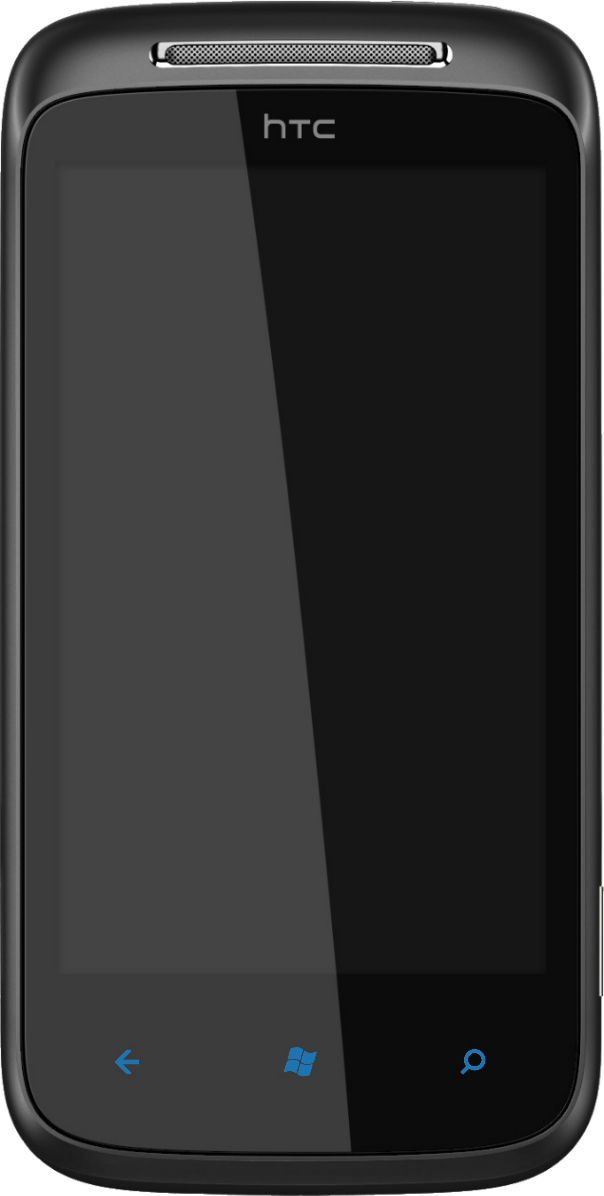
The image should have a minimum resolution of 610/1109 (I found this image http://microsoftfeed.com/wp-content/uploads/2010/10/Windows-Phone-7-HTC-7-Mozart-Front.jpg)
2. Now we edit the mask image to be as the original images and so that mask rectangles will be over the buttons.
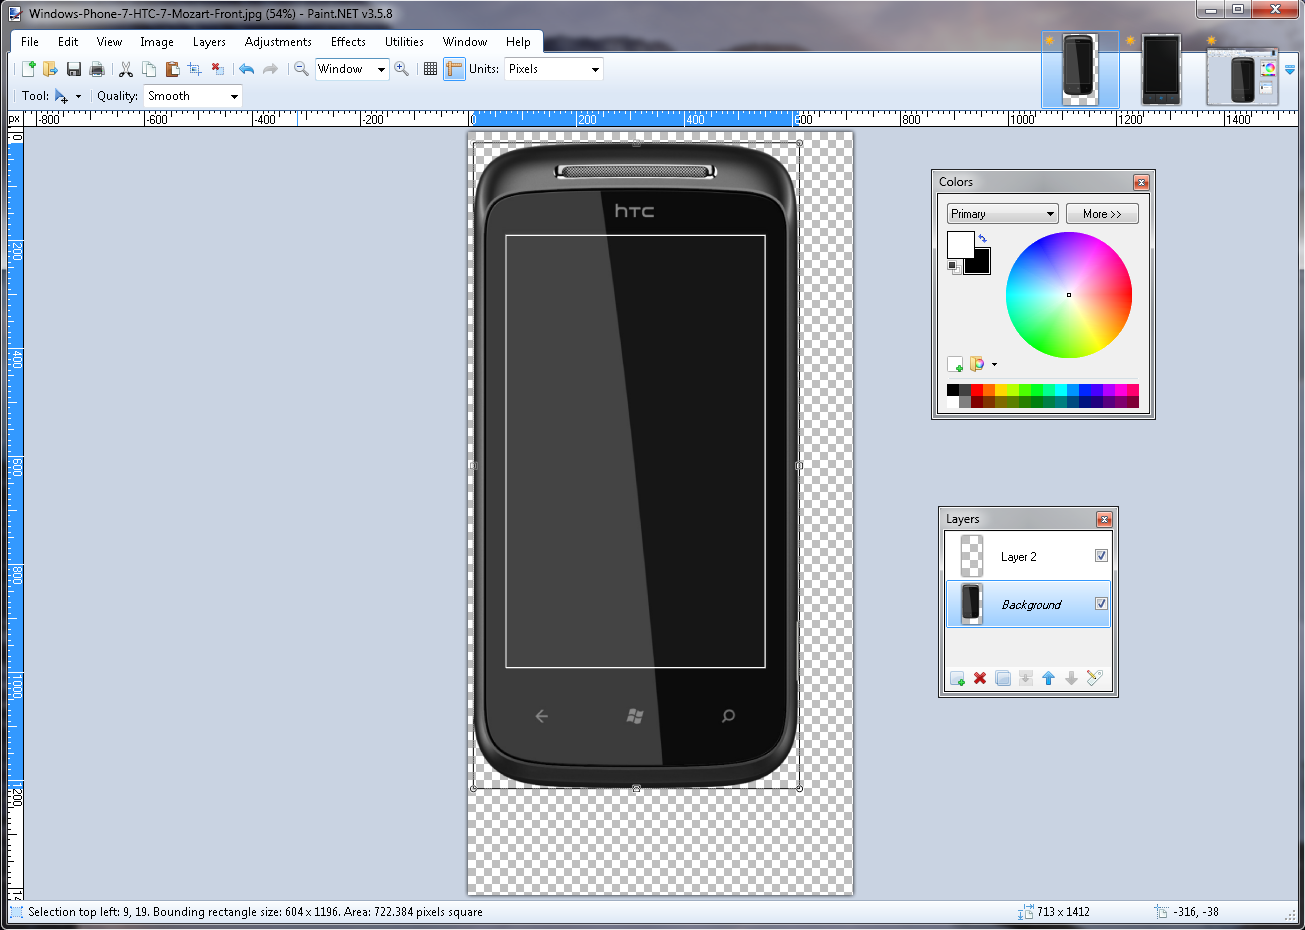
To do that I am going open the image in Paint.Net add a new layer and paste the mask image , and then I will use the Magic Wand to remove and delete the white background.
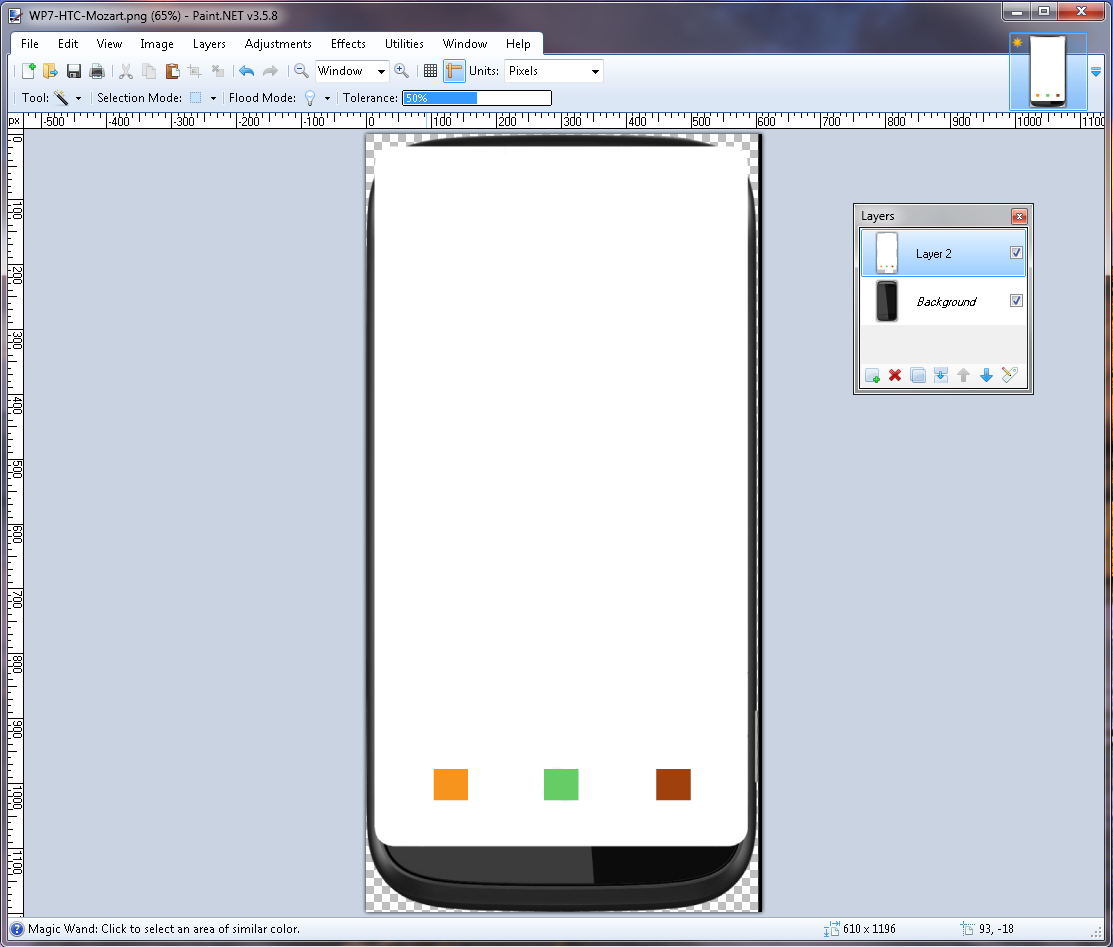
Then we move the image on this layer so that rectangles are exactly over the buttons and then we make all the image to be white using the Paint Bucket.
Select the layer with the mask , select the white background with the Magic Wand and then delete that, so you will end up with the colored rectangles only and is more easy to center.
Resulting Mask image
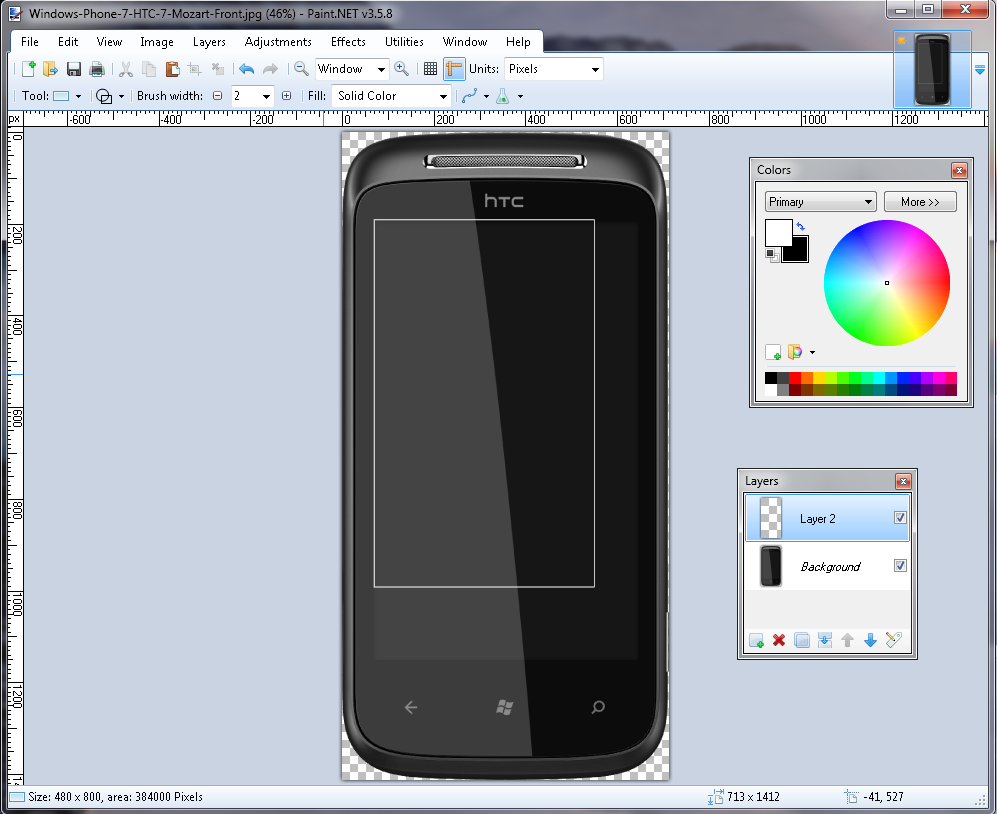
 After the mask is created we make the Down image by editing the image and adding filling the image buttons with the same color as in original Down image.
Resulting Down Image
 3. Now to edit the XML file.
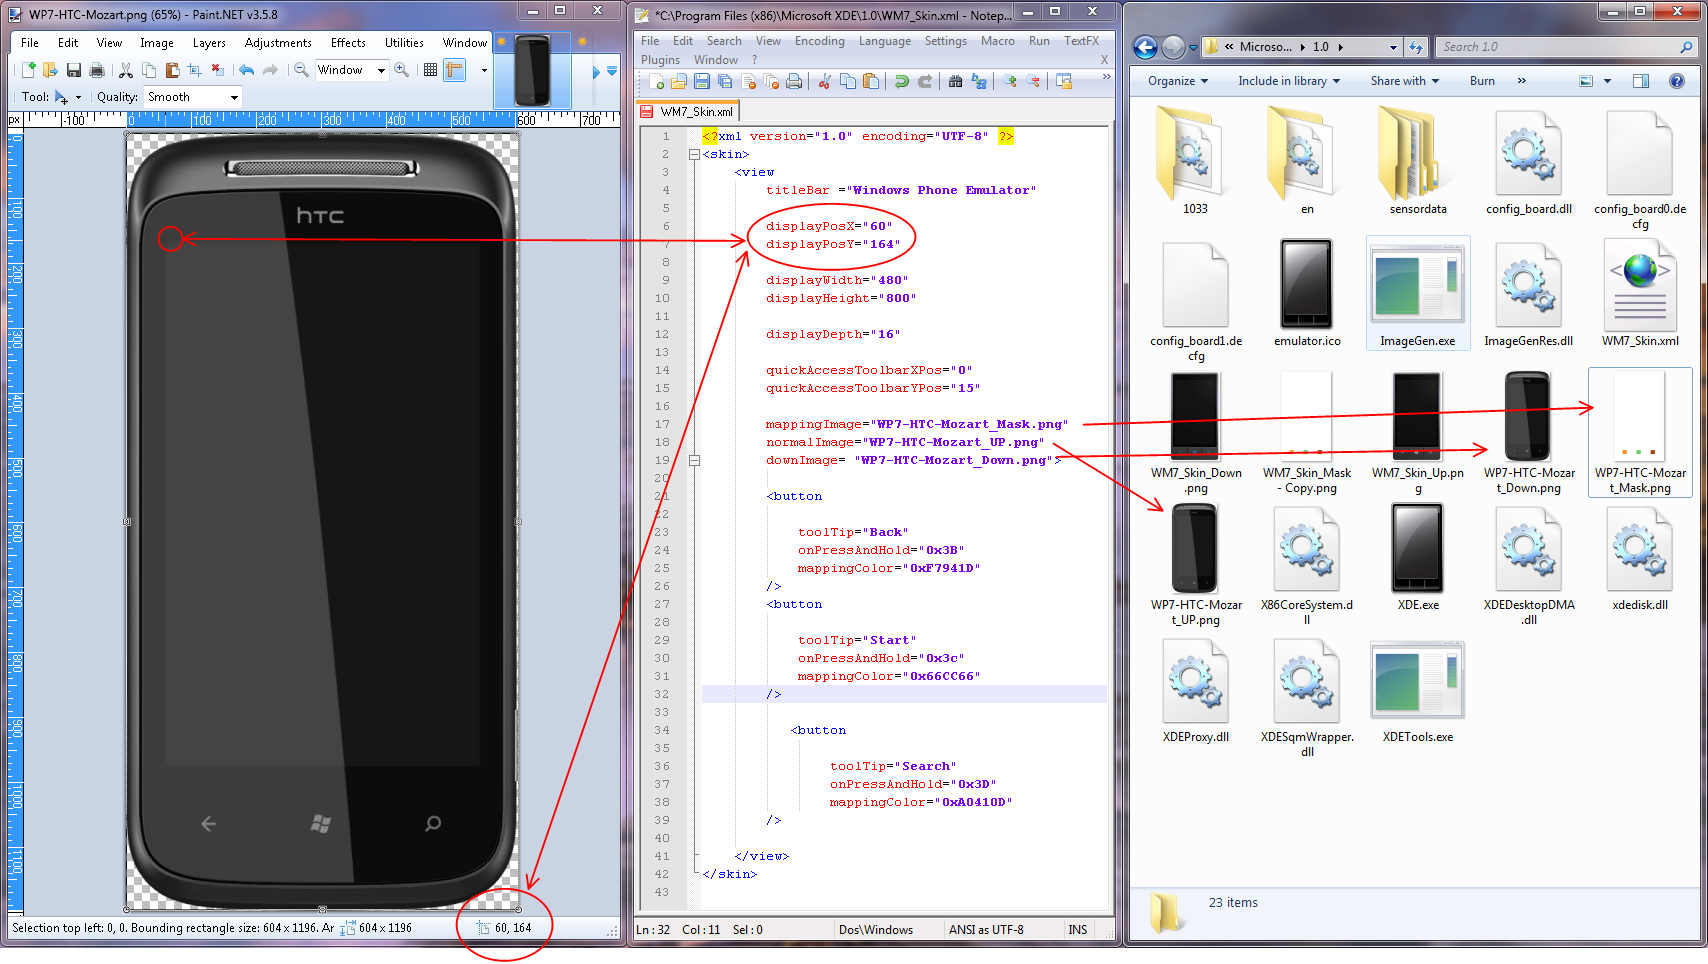
In this image we see the relation between the physical file’s and the xml so all we have to do is to open the xml in notepad or some editor and just write the new filenames and very important to get the exact location where the screen is starting in my case 60 and 164, but if you make a mistake you will see in the Emulator and edit the xml again.
After we have the the images in the same folder and the xml is edited we can make a try to see our new Emulator.
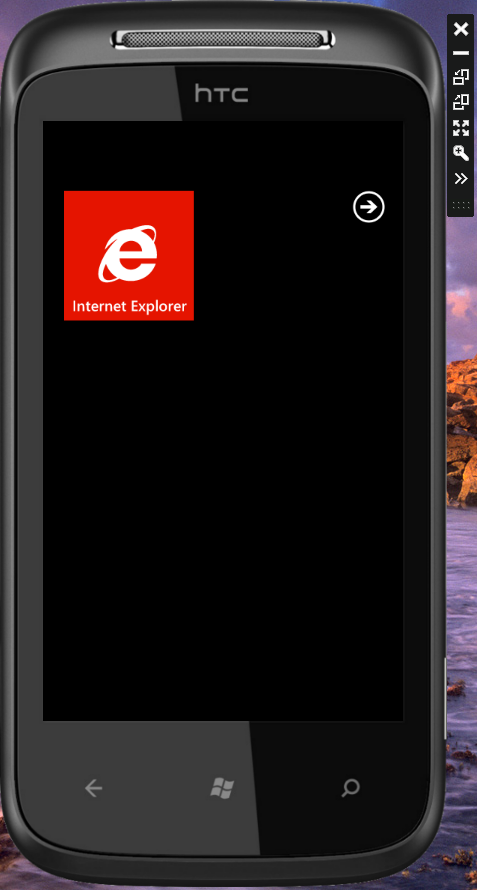
Original Emulator Custom Emulator
This is exactly what I am going to show ho to do in this blog post.
Note: If you don’t care how to make one and you want the HTC Motzart skin then just downland the files from here HTC Mozart Emulator and add them in ” C:\Program Files (x86)\Microsoft XDE\1.0″.
But if you want to know how is made and how to make you’re custom skin then read all post.
Important: Please make a backup of the existing WM7_Skin.xml , just in case, or just take them from here “C:\Program Files (x86)\Microsoft SDKs\Windows Phone\v7.1\Emulation”, if you want to have the original skin.
So let’s understand what is happening:
The emulator image of the emulator is stored on “C:\Program Files (x86)\Microsoft SDKs\Windows Phone\v7.1\Emulation” but the images are also stored here “C:\ProgramData\Microsoft\XDE\1.0″ .
The images that are taken by the emulator are actually taken from ” C:\Program Files (x86)\Microsoft XDE\1.0″ , this is the magic place.
We will edit WM7_Skin.xml to reference the images and replace the WM7_Skin_Down.png , WM7_Skin_Up.png and WM7_Skin_Mask.png with some images that should meet some exact specifications:
1.The display screen from the image should be the same dimensions ( 480/800).
2.The mask image colored rectangles should be exactly over the buttons in our image.
3. The XML file should reference our new images and screen start position.
Let’s do it now:
1 Search an image and edit it to meet the requirements
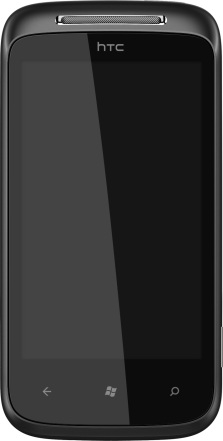
The image should have a minimum resolution of 610/1109 (I found this image http://microsoftfeed.com/wp-content/uploads/2010/10/Windows-Phone-7-HTC-7-Mozart-Front.jpg)
Now we will edit this image so that the screen size is exactly 480/800 and for this I will use Paint.NET is free and darn good, much simpler than Photoshop.
Important : We make the image as png with transparent background.
To edit this I will open the image add a new layer draw a rectangle of 480/800 and shrink the image until the screen is the same as the rectangle , crop to the new image size and save the image as png .
Important : We make the image as png with transparent background.
To edit this I will open the image add a new layer draw a rectangle of 480/800 and shrink the image until the screen is the same as the rectangle , crop to the new image size and save the image as png .
To do that I am going open the image in Paint.Net add a new layer and paste the mask image , and then I will use the Magic Wand to remove and delete the white background.
Then we move the image on this layer so that rectangles are exactly over the buttons and then we make all the image to be white using the Paint Bucket.
Select the layer with the mask , select the white background with the Magic Wand and then delete that, so you will end up with the colored rectangles only and is more easy to center.
Resulting Mask image
Resulting Down Image
In this image we see the relation between the physical file’s and the xml so all we have to do is to open the xml in notepad or some editor and just write the new filenames and very important to get the exact location where the screen is starting in my case 60 and 164, but if you make a mistake you will see in the Emulator and edit the xml again.
Original Emulator Custom Emulator
Here is an archive with the files for HTC Mozart Emulator


